Wednesday, November 21, 2012

The beginnings

One day long ago, well not really it's only about 3 years ago now (ha ha) I was introduced to the style of Tim Holtz.  Little did I know he would take me on this amazing creative journey and inspire almost everything I create.  It first started with the foamy tool and the distress ink pads and my creative world skyrocketed from there.  From the little metal embellishments to something as simple as a stamp, the sky is the limit and this is only the start.

I wanted to share my first real creation that I made for a friend of mine from Toronto.  He has been on his own journey of fighting cancer and a special day came along for him that I wanted to celebrate by making something special.  So my chipboard albumn journey began.  Many hours of my heart and creativity poured out into this project and it's one of my proudest accomplishments.  Not only because I loved it when I was done but because he appreciated it even more (I wish you continued positivity in your journey Nicolas).

Canvas printed

Photo is printed on sticky back canvas (LOVE)


Sunday, November 18, 2012

A Day of complete creativity

Yesterday was a wonderfully creative day with a really good friend.  We accomplished a lot and had some fun doing a little shopping at a local Christmas craft fair which has become a yearly outing for us.  Thank you Barb for an awesome day.

So what did I get done well just wait for it!

1. A wonderfully delicious little gift tag with a bit of grunge factor to it.  Tim Holtz your my inspiration!!!

 2. 4 sets of my FUN little Christmas card and gift tag boxed sets.  These were a hot little seller at my work last year so I thought I would create some new and fun one's again.  My inspiration was a 2011 paper line from Cosmo Cricket called Dear Mr. Claus.   Eeeeeps, Christmas and retro all rolled into one!  Heaven!!

Set #1  - Tis the season for baubles and snowmen


 Set #2 - You light up my Happy Holidays

 Set #3 - Isn't he lovely


4 - Christmas greens and reds


I also had a few minutes to throw this little gal together.  Doilies are an awesome and easy way to dress up a card or page!


Sunday, September 23, 2012

Hanging out with the pretty things

Quite some time ago I came up with an idea of how to display/store my wonderful jewelry.  Why have it hiding away when you can look at it each and every day.  Also it's a reminder of what I do have in my arsenal ;)  So today I finally took on the challenge of creating my creation.  Voila my jewelry a la frame was created.  The best part .. it only took me about 15 minutes.  How did I do this you ask?  Well here you go:

I found this fabulous frame at a garage sale in the spring.  It's an art trying to find actual wood frames nowadays and this one is all wood.  I cleaned it up a bit but did not do anything with the color.  Isn't she fabulous??  Next I had traveled to the hardware store and found some mesh wire to use at the background to hang the earrings on.  I cut the wire to size so it fit right into the groove on the back of the frame.  Next step .. staple, staple, staple.  I stapled the wire right into the frame and that was it.  Yes really, that's all it took to do this.  Preferably if I had some cording I would finish off the back of the frame to ensure none of those sharp bits end up hurting the wall but for now it looks wonderbar!

I love taking something old and making it new again and this by far is one of my favorite projects to date.  I have a whole bunch more of these frames in my storage which I will be working on as a winter project.

Next I'm off to my annual creative paper crafting weekend.  Imagine, log cabins, the forest, the lake and 3 wonderful days of creating.  Eeeps, I'm a little excited because a) the scenery (just bought a new camera. b)the togetherness of friends and creativeness and c) getting pampered (we get fed and can go for "optional" massages .. really, optional and massages should not be in the same sentence.  Who wouldn't want to get a massage???

Anyhoo ... tally ho, will check in after my weekend.  I'll leave you with this.  The Art of creating is taking oneself and immersing one self in your inspirations.

Michelle

Monday, January 23, 2012

Some of my past creations.  These are projects that took me quite a bit of time and at the end of it I felt so AWESOME and the best part was the reaction I got when I gave it to the recipient :)

A albumn of all the favorite things I like to do as far as papercrafting goes.  This took me hours and hours but it was sooo worth it :)  This is just part of it.  Everything on here was either made from scratch or altered to fit the theme.  Tim Holtz was a bit of inspiration for this one.


 My neice's graduation card.  She loved it :) :)

 My nieces grad present - A shadow box of the creations that helped her get into Emily Carr.  She LOVED IT!!!  The picture is not that great but that giant black frame in the middle was just fabulous.  It was my 2nd inspiration .. right after her pictures.  She has such talent.

My newest venture.  Refinishing trunk sale finds :) FUN!!!!  This one is for sale $200.  Great as a outdoor patio bench or a entryway bench.

Monday, December 5, 2011

Under the weather

Under the weather .. speaking of weather I miss the snow, where is it?

So here I am at home from work not feeling well .. the cold has kicked my butsky.  What a better way to spend my time than working on TH's Tag # 5.   I LOVE LOVE LOVE this technique with the alcohol ink and archivers ink.  This is the first time I used it and I can't wait to do it again.  Since I didn't have any of the supplies and as Tim says .. use this as inspiration I did just that.  Wow was I inspired to create on this one.   These products and Tim continue to amaze me .. what an creative way to outlet my juices so to speak .. ha ha.  Speaking of juices, wine anyone?? ha ha.  Yes I am a certified dorksky. 

So how did I approach this tag well ...
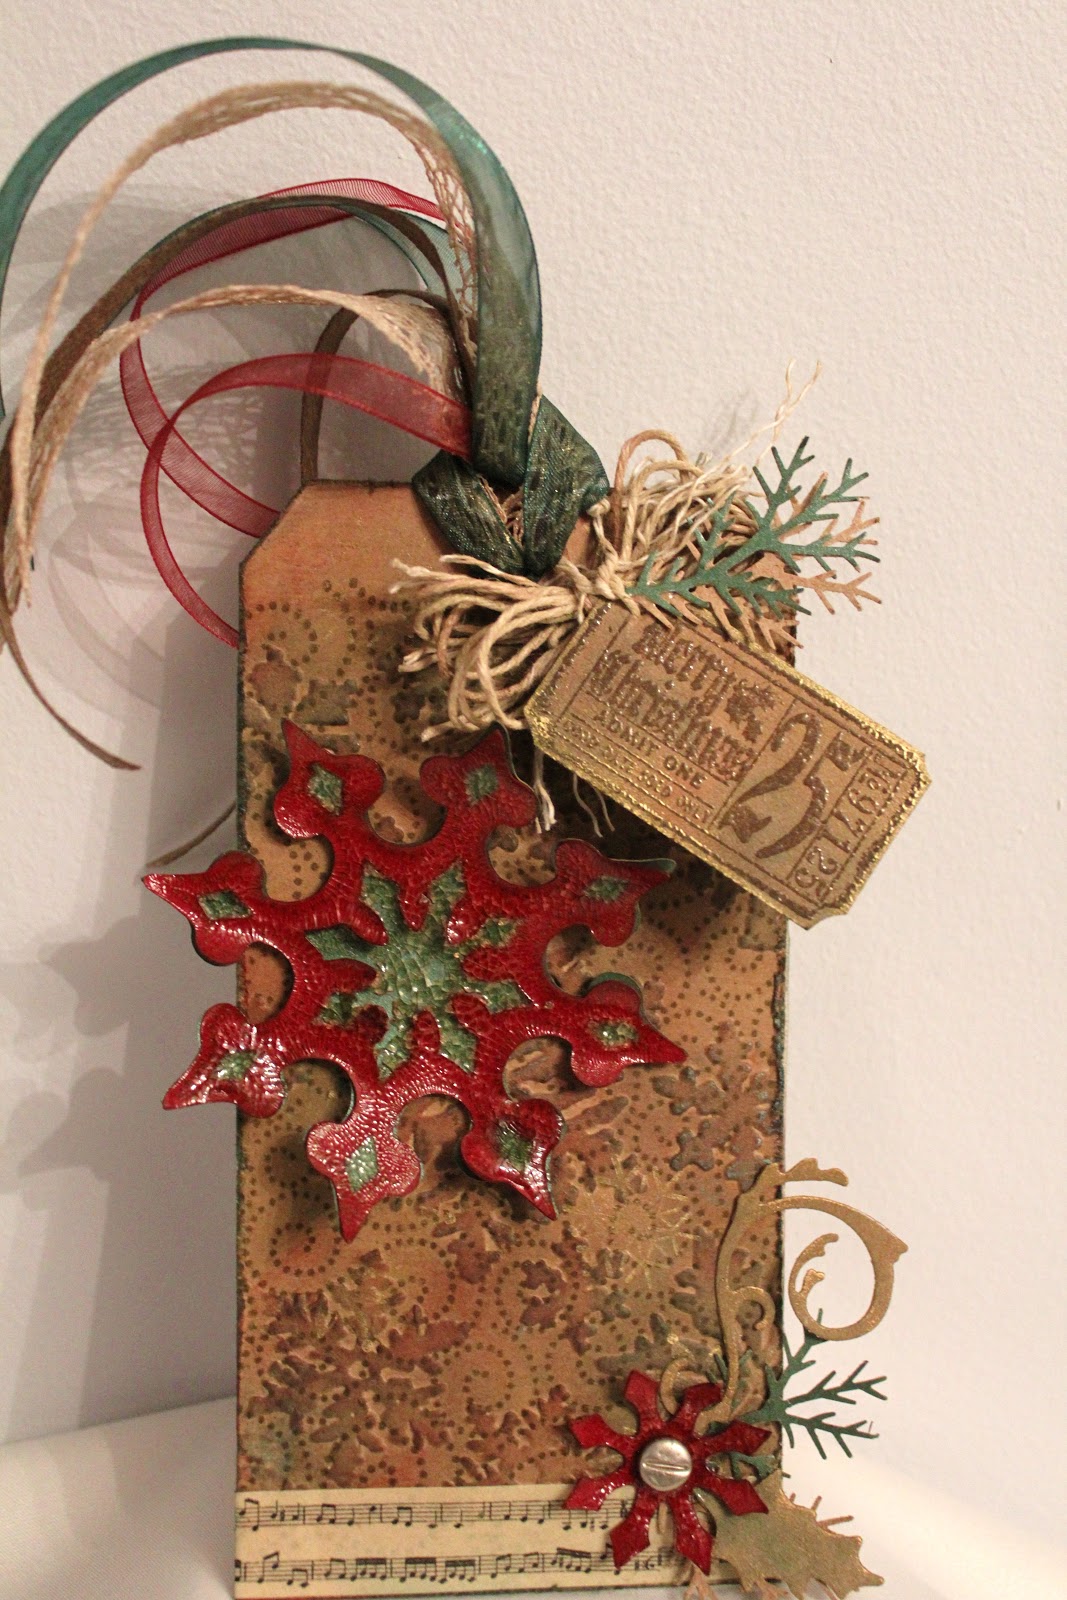
1. What stamp did I have that I could use to replace the backwards Christmas stamp that Tim used.  I found in my TH collection the "retro holiday" stamp set with the pine cone stamp in it.  There was my background.
2. Since I only have the "Cabin Cupboard" alcohol inks so far this was perfect to use with the pine cone stamp.  I used all 3 colours on my background.
3. Oy, I didn't have any holly or the leaves that Tim used.  Should I use pipe cleaner .. no, didn't suit the theme very well.  In my collection was the "Spellbinders" nestabilities set - Deckled edge classic ovals LG.  Instead of a wreath I created a frame using two of the dies to create it.
4. Colour of frame .. mmmm .... well because of the alcohol inks I decided to go with a bevy of acrylics to create some depth.  I used "DecoArt" crafters acrylic in "Spun gold", then I used "Folk Art" acrylic in #925 Wrought iron over top.  Then I distressed it with sanding paper.  After that was dry I added "Folk Art" 658 Metallic Antique Gold to finish and voila .. I have a vintage looking frame.
5. Added the pearl flat back stickums.  These are sticky little guys!!!
6. Made my bow using the "Celebrate it" holiday ribbon in gold netting (Item #188630) available at Michaels Canada.  I attached my bow with a sticky dot and it holds great.
7. Next I cut out the letters J,O,Y from TH's paper stashes.  Once cut out I covered them with glossy accents and attached them to the frame using pop dots to add some depth.
8. Last but not least I finished off my wonderful peace of altered art with "Celebrate it" sheer creations in a antique gold (Item #10025155)

Tuesday, November 15, 2011

Product inspiration

Sometimes I buy a item and add it to my papercraft collection and am not sure why other than I LOVE IT!  Well everything came together when I purchased Tim Holtz resist paper pad and needed to make a graduation card for my niece.   A students notebook jumped out of the pad of paper at me and the creative process began.  A cover for her card was the first thought, then came the chipboard sheet to attach it to.  My niece was on her way to a prestigious art college in Vancouver and I wanted to show her, by making a awesome card, how proud I was of her that she was living my dream as well as her own.  I poured my heart and creative soul into this card and my hope is that when she looks at my card that she remembers my heart is always with her no matter how hard it gets and how the small things that inspire us can turn into something wonderful.  The journey began and here it is ...  Love you my dear niece.


Wednesday, April 28, 2010

Creativity block

Happy Wednesday

As the title suggests on this post it appears I am suffering from a bit of creativity block.  I am mid reorganization of my crafting area so that may have something to do with because I am definitely not lacking on projects I need to complete.  I finally ordered myself a nice desk to create on but am patiently awaiting it's arrival.  So my supplies and dining table(previously know as craft table) are currently at two different ends of my apartment. I think I was a little too excited about the new desk and prematurely moved things to their new homes.  I should have waited for the new desk to arrive first.   

Anyhow the project deadlines are not waiting for me so I will suffice.  Mother's Day card, retirement card and Dad's scrapbook are on my horizon.   I have many new shiny toys to play with so I can't wait to utilize them for these projects.   I so far have 3 of the new Tim Holtz Sizzix dies. Whooppeee :)  SO happy.  All three will be used in these 3 projects I have to do.   I have a ton of the new Bo Bonny papers which also, are incorporating themselves into these 3 projects. The weekend is near so the goal will be to complete the two cards first.  I will share pictures once they are done.  Sneak tidbit .. the retirement card has a motorcycle theme and the Mother's Day card will have a flower theme.  Hence the use of the Tim Holtz tattered flowers die .. Did I say whooppeee???  

On a side note I purchased these mini carnations and wow, do they ever smell amazing.  I am baffled as to how one color has an amazing aroma and another color has no smell at all???  The fuschia one's with the pale pink edges are the best by far.  

So I am off for another two days at work and in the meantime and finding wonderfully creative projects online that are giving me great idea's.  The web is an inspiring and amazing place.  I'm so lucky to be able to be a part of it.